How To Prepare For Your First 14er!
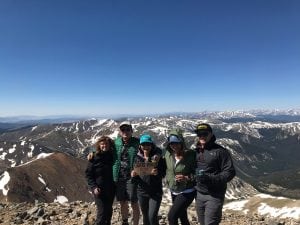
Colorado has close to 60 14ers, which means peaks of at least 14,000 feet. The reward for reaching the summit of one of these are some of the most breathtaking views you’ll find anywhere on the planet. Before heading out, first-timers should take note of a few tips!
Choose an ideal peak, date, and time
The first step in planning for your first 14er is choosing a peak. A good place to research your peak is AllTrails. Choose a moderate trail for your first attempt. The difficulty of climbing a 14er is no joke!
Keep your eyes on the weather; afternoon thunderstorm are the biggest risk as you are above the tree line and completely exposed. They are common in July and August. September can be one of the best months to climb, but 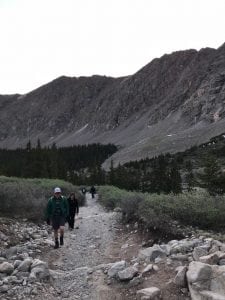 early snows are possible and hypothermia is a killer.
You’ll want to arrive early, before sunrise is best because of the afternoon storms. It is a good rule of thumb to be beginning your descent around noon. Parking at many of the trail heads is scarce and many hikers end up traversing long distances from their parking point to the trail head, adding additional mileage to their day.
Grays Peak was my choice for my first ascent, about 2.5 hours away from downtown Denver. Torrey’s Peak is actually connected by a saddle, making it possible to bag two 14ers if you are up to the challenge. Grays is a 7.7 mile round trip hike with 3,562 feet of elevation gain. The terrain is not steep but a gradual and relentless incline and a tricky scree and talus trail.
14ers for first-timers
Grays Peak: Elevation 14,270 feet, Class 1, 8 miles round-trip, 3,000 feet gain
A solid, gentle, well-traveled trail. If you’re feeling ambitious, add on Torreys for your first two fourteeners. Camping available.
Quandary Peak: Elevation 14,265 feet, Class 1, 7 miles round-trip, 3,450 feet gain
Close to Denver, trail is well-marked and a relatively tame ascent. Popular with backcountry skiers.
Mount Bierstadt: Elevation 14,060 feet, Class 2, 7 miles round-trip, 2,850 feet gain
Considered by many to be Colorado’s easiest 14er, mostly-gentle climb, great option for younger hikers. Add a challenge by continuing to nearby Mount Evans along a ridge known as The Sawtooth-an intermediate-level hike.
Packing for a 14er
Use a small day pack with multiple pockets. Here is a basic list of items you’ll want to be sure to bring:
- Water: Plan on 2-3 liters depending peak difficulty and time of year. Don’t skimp on water. Staying hydrated is
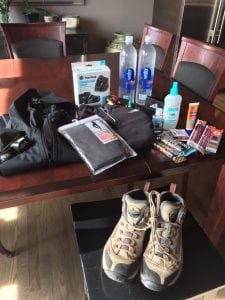 key to warding off elevation sickness and muscle cramps!
 - Sunscreen & chapstick: Do not underestimate the importance of this. Even if you are fully clothed, wearing a hat and sunglasses you need protection from the intense sun at this elevation.
- Sunglasses: Glare is common with rocky terrain and snow fields.
- Phone: Though you may not get service at all times, you will want it for photos and gps. I recommend turning off roaming until you summit so that your battery will last longer.
- Lightweight fleece, down, windbreaker or rain jacket: Two of these type of options is not a bad idea. The wind at the peak is sustained and something with a hood is a good choice. Keep it compact and packable. Staying warm and dry should be a top priority.
- Snacks: Handheld style snacks are a must. Choose things that are easy to digest and portable. I chose Gatorade Energy Chews, Kind Bars, and Vermont Smoke & Cure Beef & Pork Sticks. I also packed a meat & cheese sandwich for the peak and a can of wine for celebrating!
- Crampons & trekking poles: If you are hiking early or late in the season you may want to consider bringing foot traction devices. I didn’t hike with poles, but I regretted this and will definitely bring them the next time!
- Headlamp: If you are starting out before sunrise or if you intend to stay up top late, consider a head lamp just in case.
- Emergency items: Some people hike with mini first aid kits, a knife, matches, compass, map, etc. I didn’t feel the need for any of these things, but I did bring along a few things that were extremely useful and will definitely
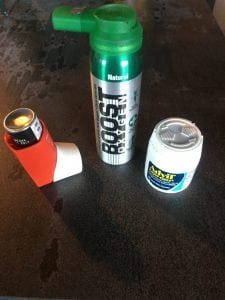 include my next time as well.
- Oxygen canister: These can be purchased in mini form at any gas station/grocery store in the mountainous areas. Puffs are short lived, but give you a good boost.
- Inhaler: If you have any sort of chronic breathing disorder, inhalers help open up those bronchial tubes
- Pain medication: It is quite common to get headaches at elevation, and cramps can set in from carrying a pack and muscle fatigue.
- Toilette tissue: It has to be mentioned. Sometimes you just gotta go! Don’t expect public rest rooms. Out-house style toilets are common at the trail heads. Bring a few sheets of toilette tissue and an empty plastic baggie to pack your paper out on the trail.
What to wear on a 14er
- Think layers
- Lightweight wicking base layers top and bottom.
- Performance fabric pants/shorts/shirts (zip-offs are a nice choice)
- Wool boot socks
- Hiking boots with sturdy support
- Running gloves or thin glove liners
- Hat or sun-visor
After the descent
A few tips for post hiking:
- Bring an extra change of clothes: It’s likely you’ll want to freshen up afterwards before you hit the local brewery
- Deodorant, facial wipes, minimal makeup
- Phone charger
- Flip flops: Extremities tend to swell on long hikes at elevation. After a long day on your feet, it feels so good to set your toes free!
Preparing your mind and body
- Hydrate: At least one or two days prior bump up your water intake. This will help immensely with the elevation.
- Cardio: It’s not a deal breaker, but if you are cardiovascular fit the difficulty in breathing at elevation may be easier for your lungs to handle.
- Sleep: Get to bed at a reasonable hour the night before and arrive well-rested.
- Nourished: Eat a small meal prior to your hike. If you’re accustomed to caffeine intake, be sure to have your usual amount.
- Pace yourself: It is not a race, hike at a moderate pace. Take more breaks near the summit. Try to drink and eat at regular intervals.
- Determination: It is mind over matter. One foot in front of the other. Have a mantra in mind to keep you going. Stamina, endurance, and determination are key to success. Keep your mind on the goal and the reward.
- Stretch: You may want to do a few light stretches before you head out on the trail…nothing too intense. At the peak and after your descent is also advisable.
- Descend with care: The descent is no joke! Often times it is more difficult since you are fatigued and the chance for a misstep and injury is greater.


